| CB-Racing | Back to Main Page | ||
| 030 Suspension Info | Roadster Bags for Sale | ||
| Christopher Brown Racing | Hidden AC Info | OBDii Wiring | |
|
Cigarette Socket Hack
|
Cigarette Socket | Tech Pictures | |
| Switch Wiring | Boxster Links | ||
There seems to be 3 versions of
the cigarette / power socket that came in the 986 Boxster. The
non-smoker's package comes with a socket that is 1mm larger in diameter
than a normal socket. This makes any plug that's put into the
socket, like a cell phone charger, very loose and they easily fall out.
Many cell phone stores used to carry an adapter ring, which
slipped into the socket and made it smaller for cell phone charges to
fit snug. However, they are getting more and more difficult to
find and the only one I had I eventually lost. After years of
this hassle I finally ordered up the cigarette
lighter socket. Only to find out installing it was more difficult
than I imagined.
Part Numbers for 986:
 Remember the part number extensions, .A02 for gloss finish and .A05 for matter finish.
Issues: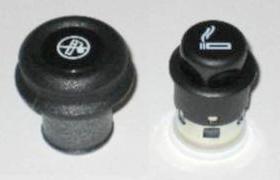
Uninstall the old socket:
Install the new socket:
Part Numbers for 986:
Remember the part number extensions, .A02 for gloss finish and .A05 for matter finish.996.652.101.10 Cigarette Lighter Socket + Lighter
The inner diameter is 21mm.
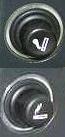
This is the US version, which is deeper and has a different logo
as shown on the bottom of the picture to the right.
All 02-04 cars came with this, while the older 97-01
came with the shorter socket pictured on the top.
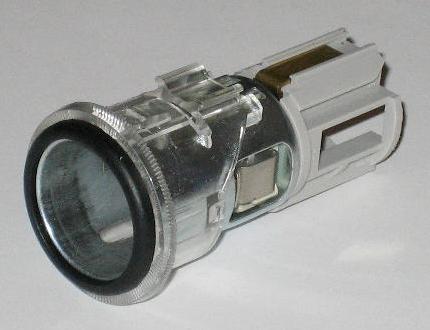
996.652.102.10 Lighted Retaining RingClear plastic ring that holds the socket into the dashboard.
996.652.103.00 Non-Smokers Power Socket + Plug
The inner diameter is 22mm.
996.652.???.?? Retaining RingClear plastic ring which is not lighted.
 (click for larger view) |
 (click for larger view) |
|
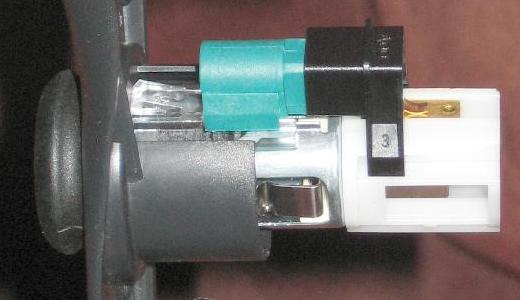
| This is the non-smoker's socket with the clear retaining ring attached. The inner diameter is 1mm bigger. | This is the smoker's socket which comes lighted (green and black pieces on top). This picture shows it installed in the switch panel. |
- The non smokers plug doesn't fit in the smaller socket. This required me to take the plug, put it on a lathe and cut the diameter down so it fit.
- You must purchase a new clear thin retaining ring because the larger one won't hold the smaller socket.
- To install the new items, you must do it in a specific order. Taking the clear retaining ring off the socket is very difficult. Some people were able to twist the socket to free it. I tried to use an exacto knife to unclip the two retainers only to cut myself prying the ring all.
Uninstall the old socket:
- Pry off the switch panel starting at the bottom and popping it off.
- Unplug the wiring connector off the socket.
- Unclick the socket from the switch panel. I was able to get the socket + ring off together at once. Others twist the socket to release it from the ring, then unhook the ring from the panel.
Install the new socket:
- Push in the new retaining ring to the switch panel.
- Unclip the illumination light from the socket. With a small screwdriver or pick, unclip the black cover first, then unclip the green light.
- Push the new socket through the ring.
- Clip the light back on, followed by the black cover.
- Reconnect the wiring connector
- Push the switch panel back onto the dashboard.